Monday, June 30, 2014

Playing with Mister Fox!!

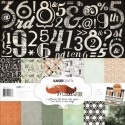
It's my turn for a post over at Frosted Designs today.... I LOVED playing with KaiserCraft's Mr Fox collection!!!


Hope everyone is having a fun summer (or whatever season it is in your neck of the woods)....
I know here in sunny Phoenix Arizona, we are having multiple days over 110 degrees and it's consistently over 100 degrees  - yes even at 9pm at night, it is sometimes still over 100 degrees!!

So, I find myself playing a lot in my air-conditioned scraproom...at least the heat outdoors is a great excuse to stay inside and play, right?

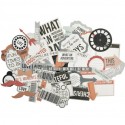
So today I wanted to share a couple layouts that I created using the new KaiserCraft Mister Fox Collection and Die-Cuts that recently arrived in the Frosted Designs store.

Orange is one of my favorite colors to scrap with my son, so this collection is right up my alley!!

First, I used some random papers and an old piece of a transparency from my stash that was in my "scrap bin".  I personally think the viewfinder fad is a little strange (even though I do still have my old viewfinder), but I love circle elements, so I love how that circular die-cut looks here.

Another note, there is one sheet of dark orange in this collection that has a floral-y print to it...(not what I would use on my "boy" pages) --- so notice on this first layout, I used it as a thin mat behind the photo and the pattern is not noticeable, only the color.


On this second layout, I again used the orange floral paper, just a thin strip down the center, again for color, but making the pattern unnoticeable.  I used large blocks of 2 of my favorite papers in the collection for each half of the design, and again used viewfinder circular die-cuts and an "Amazing" die-cut (popped-up) for my title element and a couple stickers to finish it off.


On this one, I used a background pattern and added some vertical stripes to accentuate the stripes on the hamburger boxes using paint and the Heidi Swapp Stencil from the "pattern" set.  A few of the die-cuts and stickers to document Sliders...an Ohio tradition.  


 On this last one, I used a full sheet from the collection for my background along with some smaller prints behind the photo.  I  mixed Modeling paste with some Lindy's Magicals and used a large stencil that's design supported my theme. 
A few stickers and die-cuts from the collection along with some jute from my stash to finish off this simple layout. 


Thursday, June 19, 2014

June Frosted Design kit layouts!!

Today I have a post up over at Frosted Designs.....here it is:


Hi, it's Joni here today sharing a couple layouts I've created with the June Capture the Moment kit.

I have to be quite honest...I LOVE the colors...maroons, browns, black and cream....but the patterns (vintage) are really not quite my style.  But, I love trying new things and challenging myself, so that's the mindset that I approached this kit with.

This first layout was a perfect opportunity to scrap my husband's Aunt that we visited last summer when we went "home".  I used Prima Time Traveler -The Traveler  paper as my background.  I also changed the card inside the pocket from the kraft one it came with to a piece of patterned paper.  I also used strips of patterned paper to decorate the front of the pocket not covered by the wood plaque.


On this wood plaque, I started by using the Prima flower Stamp for a light design on the top left and lower right of the plaque.  Then I created the heart by using the stencil and blocking off 2 of the hearts with scrap cardstock paper, so I only had 1 heart showing.

 I then used modeling paste to put the heart design onto the wood.  While it was still tacky, I stamped the lower left (Anywhere) so it overlapped a little into the heart and I used another stamp (Ticket) to make the larger impression that is just to the left of the flower.  I added the Ranger Liquid Pearls to make the black outline.  I then added the red Ranger mist by dripping it into the heart and let it set up in the grooves (and the black outline held it in).  I also spritzed the entire heart with the mist as well.  Added a bit of the trim and a flower from the kit and a bit of twine from my stash.


For me, I find that family photos seem to work well when I have vintage patterns, so I choose a family shot for this layout.  The background is Prima Time Traveler - No. 70 paper and the elements to the left and right are the ATC cards.  The paper that hold the "Family" title which is also an element along the top is Authentique Abroad paper.  A tag, flowers, brads, trim, enamel dots are all from the kit.


I used one of the Maya pockets here, but I used it untraditionally.  I unfolded the pocket (and cut it up) and used it behind my photo.


Now, I really wanted to stretch myself and NOT create a vintage layout.  I liked the little ticket and brad that said "Let's Travel", so I went through vacation photos and realized that I never told the story behind these photos.  I used the stencil (diamonds) from the March Beauty of Nature kit along with some Lindy's Magicals mixed into my modeling paste.   I cut banner designs in the paper and then clipped off a few pieces in the same pattern and added them to create a chevron look that supports my "looking up" theme.

The "Today" and " Like" frames are from my stash but since they are also Maya Road, they match perfectly.


I used one of the Maya cards without the pocket, but I didn't want to use "their" journaling lines, so I just cut a piece of kraft cardstock the same size and layered it on top with my title some trim and a brad.


I also added some stamped elements to finish it off.


My journaling: 
(Today frame):  Driving Down the Las Vegas Strip
TITLE: Memories from the Sun Roof
(Like frame): Great view of the awesome hotels...until the bicycle cop came by and made you get back in the car.


And my last (but favorite) layout using this kit is another "non-vintage" layout!!  

I was just feeling nostalgic when I did this one, so I focused on the word "Moments" from the Lace words...I decided that I would put that title directly on my photo.  I layered a few of the sheets of paper and mounted the photo on one of the wooden plaques where I inked the wood & some of the trim. 


I then wanted to add the Title of "Cherish" ... so I decided to try the new Hazel and Ruby mask letters from the store...you can use them OVER AND OVER again...LOVE that!!   See the product list at the bottom of this post to see the letters I'm talking about!!  
So, I put them on, misted with the Red Ranger mist...then removed the mask (letters) and outlined with black pen.  I decided to also add the Lace word "Life" right on top of the word Cherish.

And some of the burlap flowers, brads, number circles and some designs I made with the Pearl Accents.


So my point today is that even if something (like a kit) isn't necessarily your style, you should embrace the challenge and see what you can do with it.  If you always scrap things that you consider "your style" you may never discover that you have a wider range than you originally thought!!!


Tuesday, June 17, 2014

This month at SKETCHES IN THYME, we have this fun sketch:


And my layout...photos from Ohio last summer....


And at Frosted Designs we had a BINGO challenge and I created this layout:
 

Monday, June 2, 2014

More layouts with Frosted Designs kits!!

I have a post up today over at Frosted Designs:


Welcome to today's Frosted Designs post... It's Joni here today and I'm going to share some fun things I've been playing with.... OUR KIT!!! -- And, I'm still playing with April's kit so just because it's June doesn't mean we can't still use up our older kits, right?

So, first I wanted to share a layout that I created using only a few items from the April Beauty of Nature kit, and mixed with items from my stash.  (who says you have to only use items in the kit together, right?)

Inspiration: I had remembered that last year when I was in Ohio, there was praying mantis on my parents front porch that I had taken a few photos of.  And...the April kit has Chipboard creatures from UmWow studios and one of them is a praying mantis.  


So, I started with one of the 7 Dots papers (sorry, I cut off the name before I realized I probably would want to share that with all of you) -  from the April Kit and one of the Heidi Swapp frame stencils shown here...  the one that says "today"  (yea, now you know why I highlighted those words above...lol!) --


I figured out where I was going to put my photo, and then I used the green Lindy's Magicals from the April kit, mixed with water and brushed that over the stencil.  I knew I was only using the bottom of the stencil so that's all I worried about.  Then I "cut out" the top of  the letter D in the word "today" with my craft knife.


I also went over the background paper with the Lindy's Magicals, green and brown, both mixed on my craft mat with a spritz of water.

I then used a PHOTO OVERLAY from Project Life to cover the larger photo...perfect sentiment and subtitle for my layout.  
Embellishments include:  Arrow die-cut from the April kit, UmWow Studios Grasshopper from the April Kit, Prima Flower from the April kit (highlighted with the brown Lindy's Magicals), Maya Road Metal Camera clip, Prima canvas borders (highlighted with the green Lindy's Magicals). I added some Washi tape, Jute and paper leaves from my stash.


Another layout using the April Beauty of Nature kit --

Inspiration:  The sheet of Marion Smith paper named "Photo Op" from the "clean option" that is blue on one side and cameras on the other side .  While I'm a fan of the camera paper, I find it hard to use because of the size of the pattern.  And to be quite honest, I'm not a fan of the blue-ish back side at all....so, my challenge to myself is to figure out how to use it...and LIKE IT!!

I figured I'd better go with a linear design for this one...so I used the "Photo Op" paper that I mentioned above (front and back sides) and used the Marion Smith heart paper called "Cloud 9" (my fave) all together!!  I LOVE how this kit matches with Kraft color so perfectly, so I used that for my background.

Found a fun "small" photo of my parents with their grandsons...

I used the flowers, buttons, wood elements and die cut pieces from the kit, along with some twine from my stash.
Now...I wanted to share a little fun thing I learned about the chipboard.
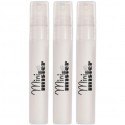
That flourish is also in the April kit...and as I was figuring out how I was going to "color it" for my layout, the Pearl Pen from the MAY kit was sitting right in front of me...so I gave it a shot.
I applied a thick layer by running the paint along the top of the chipboard...it was pretty "raised" and I just made sure it was even and covered.  It dried and is soooo gorgeous..it looks like an epoxy or enamel embellishment!!  Guess what I'll be using on chipboard more often in the future?!!
 1)  don't forget to go back and use your older kits up... 
(and mix them with other kits or even your stash)
2) find inspiration in weird things like bugs and papers that aren't "your style"
3) don't be afraid to try something new 

I've been playing with my April kit too... I'll be sharing a few of those layouts too!!  Both the April Beauty of Nature kit & May Simply Sweet kits are still available in the store-- get yours quickly!!
The April kit has been my favorite kit so far that Debbie and Barb have put together!! 
(and it's "just my style")